
 (1)")


Disclaimer: Will work for pens! That’s right! When Pentel contacted me and asked if I wanted to try out their new line of super colorful pens, I jumped at the chance. I loved them, so I’m sharing them with you! All opinions are my own and are true!
I’m so not crafty. I can imagine how I want something to look. I can visualize creating things, but the execution? I could be a star on any Pinterst-y type of fail show, I’m pretty sure the “FAIL memes” floating around are all based on my creations.
When I became a girl mom, I was scared, and I still am. I’ve never been able to replicate pretty hair styles, fashion isn’t my forte and now I’d be passing on that missing trait to my kids. But I sure love craft supplies. I love the possibilities. When these brand new, shiny pens arrived on my doorstep, I started dreaming. I used them to sign my name on cards, I used them to color lunch notes for my kids and I used them in my planner.
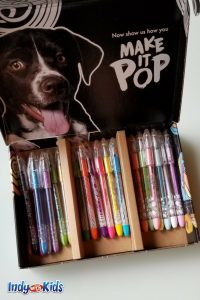
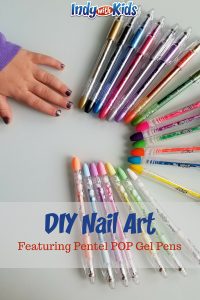
This limited edition Pop Series Collector’s box with seven Milky Pop pens, Six Solar Pop pens and my personal favorite, eight Sparkle Pop pens is perfect for the experienced creator and the wannabe (that’s me!)
This summer, my kids became obsessed with nail designs.
I’m not an artist. I’m not even that great with your basic nail polish application.
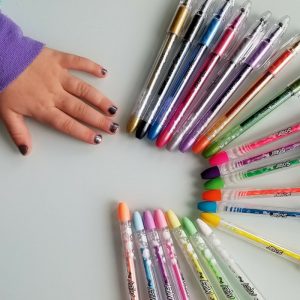
My Pentel POP pens made it easy and fun! My kids could even help each other create fun designs on their nails using the Sparkle POP pens or the Milky POP pens. Next time we’ll use a lighter color nail polish and see if the Solar POP pens work.
Creating your own Pentel POP nail designs is super easy, but there are a few important things you must do. Here’s how we did it.
 Polish your nails
 Polish your nails
Select a color that makes a nice backdrop for the colors you’ll want to use for your designs. Let that nail polish DRY, all the way. You don’t want it to be soft or tacky at all.
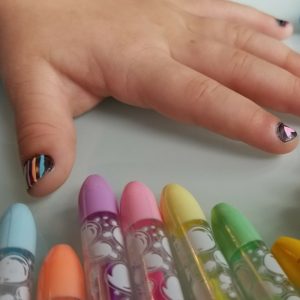
Create designs on your nails
Grab a piece of paper and get the ink flowing. Once it’s easy to draw, you can practice your creation on the paper, or just get started. We tried vertical stripes, horizontal stripes, polka dots, hearts and flowers. Then let your nails dry again. All the way.
Apply a topcoat
Once your nails are completely dry, apply a clear topcoat to seal in your pretty nail designs. This will create a shine for the matte Milky POP colors and lock in your colors.
I’m giving away a set of the Pentel POP pens and I want you to win. It’s easy to enter. Just share this article on Twitter and tag @indywithkids and use the hashtag #PentelPOP. On August 15th, I’ll close comments at noon Eastern time and select one random tweet and send that person a set of these gorgeous pens so they can get creative too!

2 thoughts on “DIY Nail Designs Using Gel Pens | Featuring Pentel POP”
Amazing work with gel pens!
Thank you!